This is a proof of concept, demonstrating video control via capacitivetouch sensors with electroluminescent feedback. The MCU interacts with an ATMEL QT1111, while PWM controlling the high voltage EL panel through a fet and triac. In turn it talks serial with our computer, serving out some blown-out HD video.
The atmel qt1111 can sense up to 11 inputs and is configurable for up to 10mm of sense gap. Here we are transmitting through 6mm of tempered glass, and finally, have gotten a fast response time...which needs some background explanation:
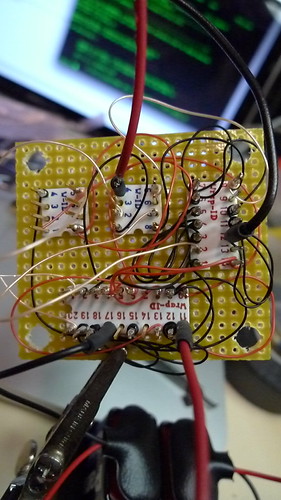
We've used this set-up before for a previous install. The propeller MCU speaks SPI with the qt1111, then prints the result over serial to the CPU. This was simple and elegant, and it worked--though a bit laggy. But at the time, we had little time to improve code. So it was installed as is. Flash forward to now: another capacitive touch interactive. This time, we can't have the lag. All of the embedded software settings on the atmel IC were teaked, as were the noise reduction resistors and sense capacitors. But still, we had a 1-2 second detection time. We needed more like 100ms. The "Print" function was dropped for a byte transmission on a whim, and low and behold, we have the speed. The entire time, I thought it was the qt1111 that needed work, when really, the Print function on the MCU side was the time hog! And well in hindsight, it hurts to make that nullifying realization-- for what good reason was I using print?
Times like this, its nice to step-back and remember that it wasn't the only assigned project, but one of many. Small details like this can have very large impacts, and if you aren't completely focused, or stretched to thin (ahem, i claim this option), than you'll feel the consequences.
Incidentally, we'll be updating the embedded code to the previous install. And though it's only really a "firmware update," it feels good to know that the problem has been solved.
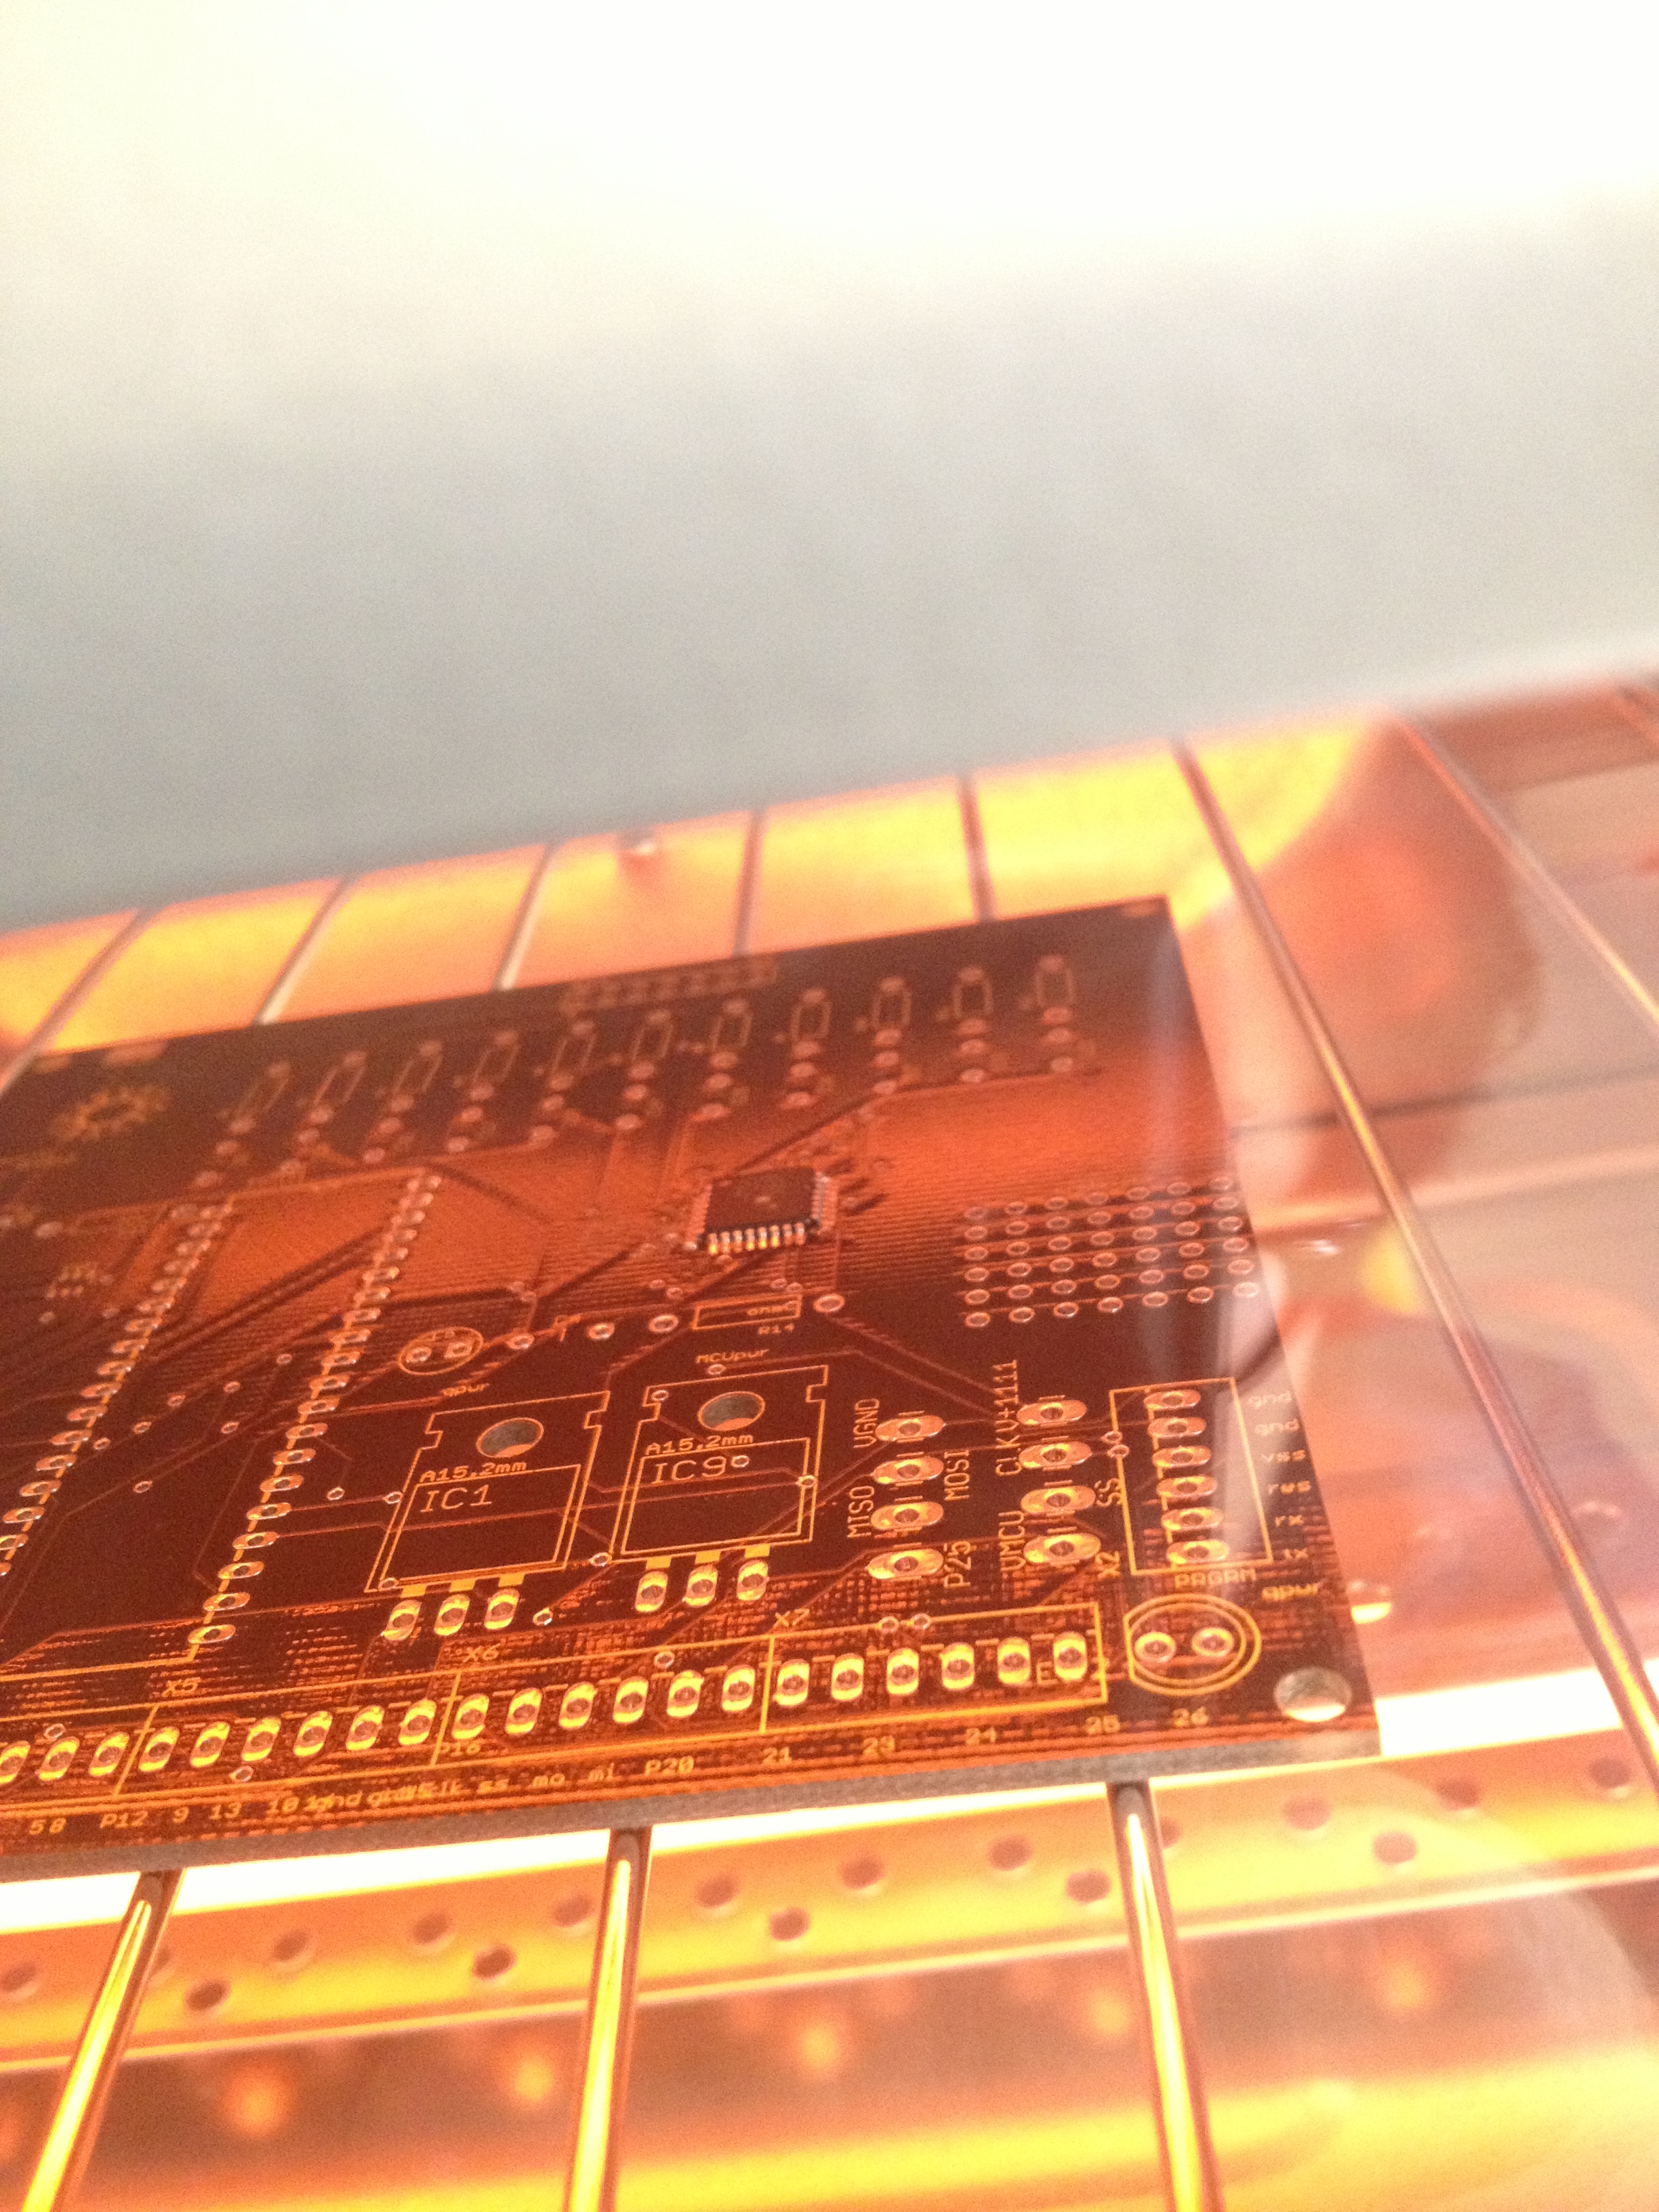
the QT1111 surviving the black and decker toaster-oven!
31 ideas, 80 people, 48 hours to design, build and code a project--only 5 to make the festival. It culminated in a 5 minute presentation/demonstration within Intersection for the Arts. Fortunately, project "i just wanna hold your hand" made it into october 20th festival!
It was an eye-opening weekend of talent and new possibilities. And, a lot of hand holding! More to come in the future...
Here's the project presentation and description by Ellen Keith, Yael Braha, Mark Roth, Tosh Chiang and Jasdeep Garcha
Conducting energy through people to stimulate tangible public interactions.
By interacting with one another people are able to transform their environment through play. Two metal hands are mounted to the wall. When two or more individuals complete the circuit they provoke audio-visual responses. The level of interactivity is determined by the flow of electricity through the individuals. The interaction can be tailored per installation; the core tool is the Arduino, and in this case we've experimented with Processing projections to activate blank city walls. storefronts, or pavement. This design allows for expansion as well as meaningful data collection. Also, we just like making people hold hands.
The 8-bit atmel attiny13 has 6 i/o and a crystal-less speed of 20mhz. We've paired it with a 2x1 audio switch and a 2 watt utility amplifier on a 50x50mm board. Every i/o of every chip is accesible via the terminals. You can strip the unit down and make it just an amplifier, or just a signal generator, or just an audio switch! This capability also gives some nice redundancy and bypass abilities. One of the two dip-switches operate dependent on the programming of the attiny. The second one can be used to manually control the audio switching. The output crossover capacitor is pretty hefty at 1000uf, providing some nice low end in the speakers, but can be easily swapped out. There's also an isp header for atmels mkII in-system programmer. Lastly, we have a 5v regulator and a 12v regulator, both of which can be accessed via terminal. The unit will certainly work with just a 9 volt battery, but the audio output won't quite have punch!
So, what can we do with this!?
make an under water sound target for pyjama sharks (done!)
Everynow and then you get an email out of the blue, which just makes you happy:
"Please construct submersible sound target to use for Pajama Shark training"
Well, it was exciting because the application is fun! The device needed to be water-proof, and operate below a range of 375hz. (this link explains why!)
The sealed pvc staff itself contains an Atmelattiny13 and a utility 2 watt audio amp. Previous incarnations of this device utilized a cd 4093, and then an arduino for the pulse trains. However, this version is intended for pcb's. Therefore, we used this opportunity to prototype a utility amplifier/function generator with all the benefits of programmable mcu control! The output of the device is an induction driver, or "exciter." Essentially, we're using the PVC pipe as our speaker. Once ready to go, the capsule was filled with desiccant and bubble packing to keep everything dry and stable.
We'll see how well the sharks salivate!
Here you can see the driver attached to the end of the tube capsule:
And a shot of the toggle switch (don't mind the excess silicone!)
Update:
There are now two of these devices in use, and both are based on the PCB version of the prototype! The sharks were recently (late july 2012) released on to live display, and have successfully associated the audio tone with a midnight snack :) Here's a a bit of coverage from local ktvu.
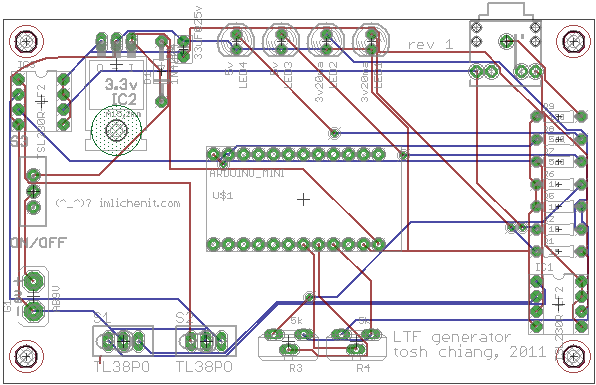
Sometime ago I posted code and a schematic for the LTF Generator. Well, here's the board for those interested! Perhaps I'll upload a video, and attach a link for batchpcb should there be enough interest...As a recap, this unit takes data from two tls230r light to frequency converters, and uses an arduino to create simple syncopation, outputting on a standard headphone jack.
Although, if i get around to it, i may just pair it all down to the essentials: boot the arduino for an attiny, throw in a power amp, and reduce the size threefold. I should do that right now.
First off, if you ever need to install 20 Passive IR detection modules, with alarms, then don't do this. The basic set-up is the zilog ePir, a SST relay, and a piezo buzzer. The Zilog unit is awesome. Aside from being a $12 dollar MCU with PIR and Fresnel lens, it also has a serial interface, left/right detection, and among other things, ready to go custom settings.
Another thing about this project is that the components are less than $30, per unit, including the chassis. When compared to the price of a commercial PIR, the price is quite nice. The bad thing is they're labor intensive.
So why did i do this? I've often worked with commercial PIR units and felt that they weren't suited to the needs of my projects. In this manner, we were able to get the kind've detection results we wanted, in a very tunable way.
Unfortunately, its not ours. In a previous era, we had an exhibit which translated the EEL's output current to an audible pulse, which the public could hear. Of course, those days are gone...
Currently, there's a hacked TEN's machine which provides a light jolt to the public. Sadly, its a complete hack-crack job-- dangerous perhaps to work on, and not made by our hands!? There have been enough complaints concerning a low level of jolt. There is one main problem: each user has a different electrical resistance. What is normal? Even upon measuring one's self (thumb to forefinger), you can get anything from 40k ohm, to 4m ohm (ahem, based on my own)!
There is one main problem: each user has a different electrical resistance. What is normal? Even upon measuring one's self (thumb to forefinger), you can get anything from 40k ohm, to 4m ohm (ahem, based on my own)!
So the question is, at what strength do we make the eel v2 circuit at: 40 volts, 60 volts, 160 volts!?? How moist will the users hands be? With what surface area & pressure will each user touch the probes? Will The users go directly from the salt-water touch-tidepool to the exhibit!!?? Well, obviously, we just need to guestamate this one...
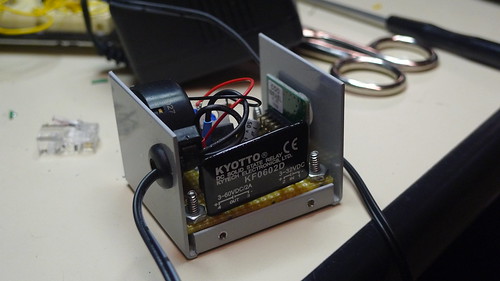
As of of now, it's a coil based unit utilizing an npn TV cathode deflection transistor. Its under stress testing right now. The first crack had problems with thermal runaway i.e. everything would work perfectly for half an hour, until one under-spec'd capacitor would overheat and pull current. anyhow, thats the update!
UPDATE 2
Well, it survived the week long bench test, so now its installed. Currently we're running a set-point of 176 volts!


 Who wants to hold our hand!?